Network Configuration Enterprise
Container deployments
This page applies to VM deployments only. Containerized Trapsters share the host's network stack and have no separate network identity.
By default, Trapster VMs are configured to use DHCP. If DHCP is not available on your network, follow these steps to set a static IP.
Configure a static IP
From your hypervisor console, connect to the VM using:
- Username:
trapster - Password: shown on your dashboard

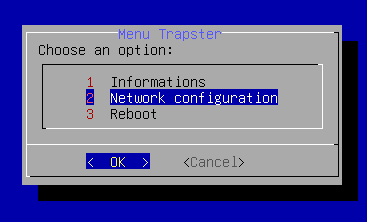
In the local menu, select Network configuration.
Fill in the required network values (IP address, subnet mask, gateway, DNS):
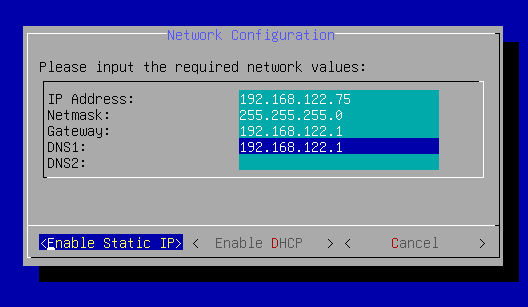
Click Enable static IP, then Reboot.
The VM will reboot with the new static IP and reconnect to the dashboard.
Accept registration
If this is a new Trapster deployment, open the Trapsters page after reboot and click Accept on the pending device. See Trapsters: accept registration.
Verify connectivity
After rebooting, confirm the VM can reach the dashboard:
curl -I https://trapster.cloudYou should get an HTTP 200 response. If not, check your firewall rules - outbound HTTPS (port 443) to <domain_id>.trapster.cloud must be allowed.