Deploy on Proxmox Enterprise
Download the disk image
- Open Trapsters → click the + card → Deploy a new Trapster
- Click Proxmox VE : the qcow2 disk image downloads to your browser
The same qcow2 image works for KVM / libvirt deployments.
See Deployment overview for the full wizard flow.
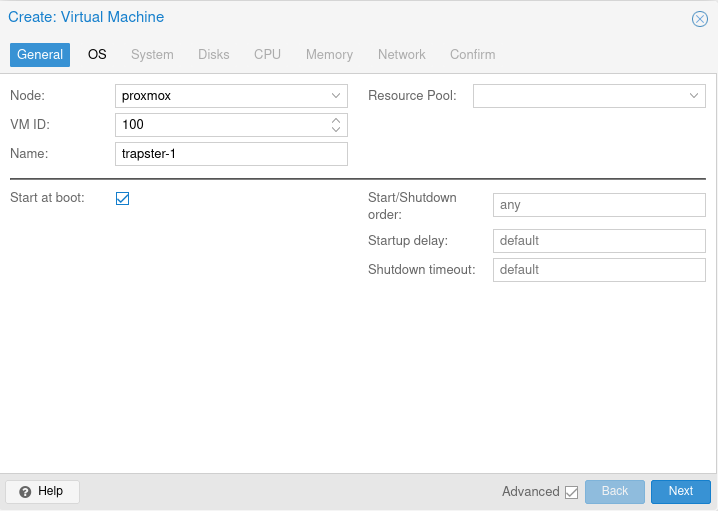
1. Create a new VM
In the Proxmox web interface, create a new VM. The name has no impact on its network identity - you can use anything, for example trapster-1.
Click the Advanced button and check Start at boot.
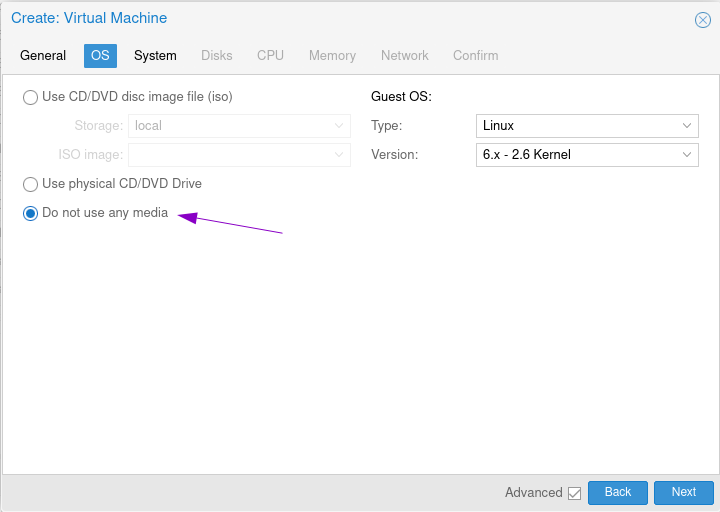
2. OS
Select Do not use any media. The disk will be imported from the downloaded image.
3. System
Leave the default settings.
4. Disks
Delete the auto-created disk. The disk will be attached after image import.
5. CPU
Default settings are sufficient:
- 1 socket
- 1 core
6. Memory
Set to 2048 MB. Enable the Ballooning option to avoid reserving the full 2 GB at all times.
7. Network
Configure the VM to receive a local IP so the rest of your network can reach it. Default settings work for most configurations.
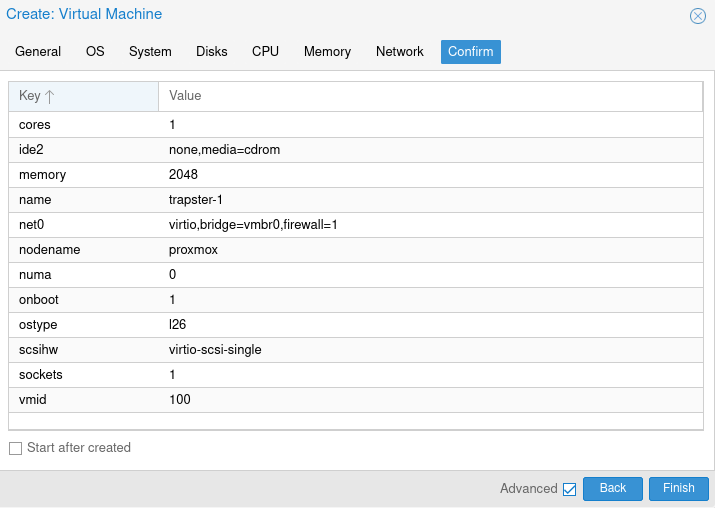
8. Confirm
Your VM configuration should look like this before starting:
Transfer the disk image to Proxmox
Send the downloaded image to your Proxmox server using scp:
scp Trapster-<version>.assets root@your-proxmox:/var/lib/vz/template/iso/Alternatively, rename the file to .assets and upload it through the Proxmox storage interface.
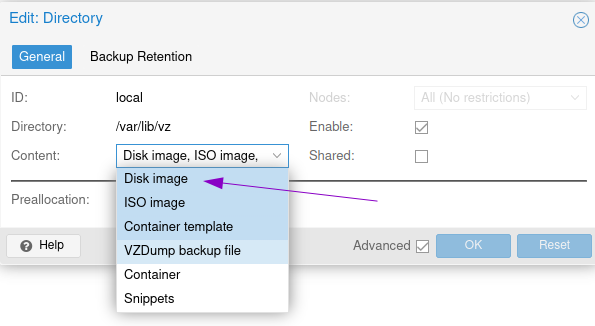
Ensure your storage supports disk uploads: go to Datacenter > Storage > local, click Edit and enable disk images.
Attach the disk to the VM
Import the disk to your VM. Note your VM ID and the image path, then run:
qm importdisk 100 /var/lib/vz/template/iso/Trapster-<version>.assets localReplace 100 with your VM ID.
In the Proxmox hardware view, double-click the Unused disk to attach it. Then go to Options > Boot Order: deselect all entries and select the imported disk.
Start the VM. It will boot and connect to your Trapster dashboard automatically.
9. Accept registration
After the Trapster boots, it appears as a pending device on the Trapsters page.